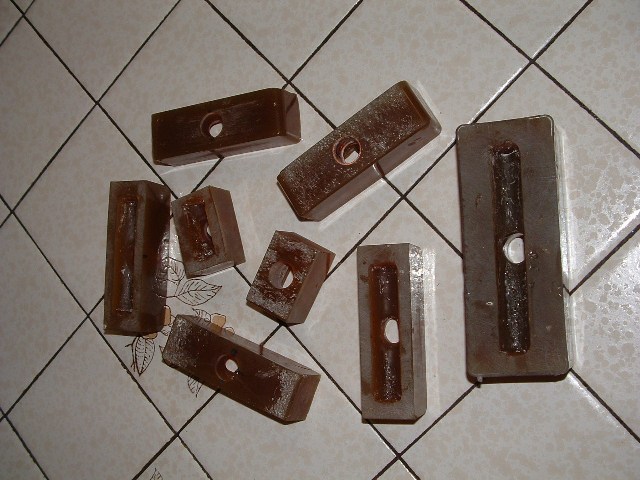
Resin Injector Block
Inspired by "Frank" on the Tackle Underground forum who made an excellent block from aluminum, I whipped up a quick "copy" made from resin. I was pouring some molds that particular morning, and came up with a "quicky" way to make one. Pictures and some info are provided here so that others may try to make their own versions. I have included some pictures and info on my 2nd planned pouring, but it has not been completed as of yet.
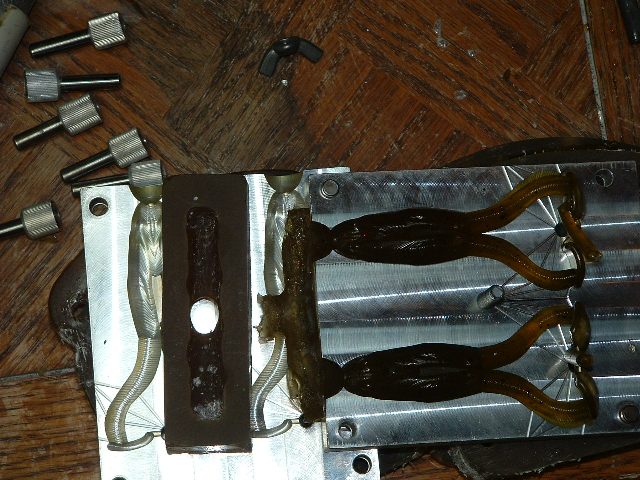
Above you will see the resin injector block along with the first test pour results. The mold is a top pour Buzz Frog made by BassTackle. The block provides plenty of additional plastic volume, to prevent the hollow noses or repeated top-off pours that are needed during hand pouring.
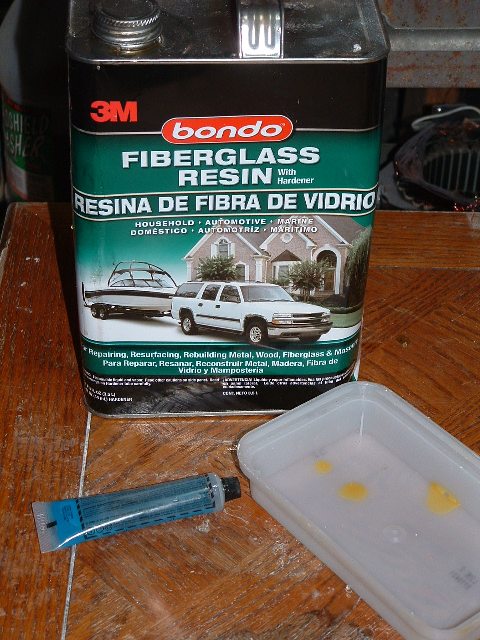
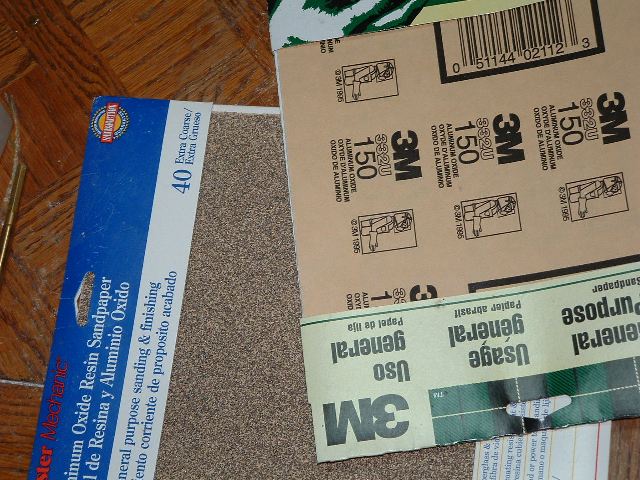
I use 3M Bondo brand resin. It is found in almost every auto parts store. This is the one gallon size that goes for around $40. It comes with tubes of hardener. If all you are doing are the blocks, you certainly don't need a gallon. I believe they sell in one quart size, as well.
The mold form I used was an old plastic lure box. The dimensions of the mold cavity are 4"L X 1.25" W X 1"D. Most of my aluminum pour molds are 4" across, but if you need a larger one, you would need to find a larger one. It would have been nice to make this 1" W to match the molds, but I was concerned with the resin thickness. The mold needs to be placed on a level surface.
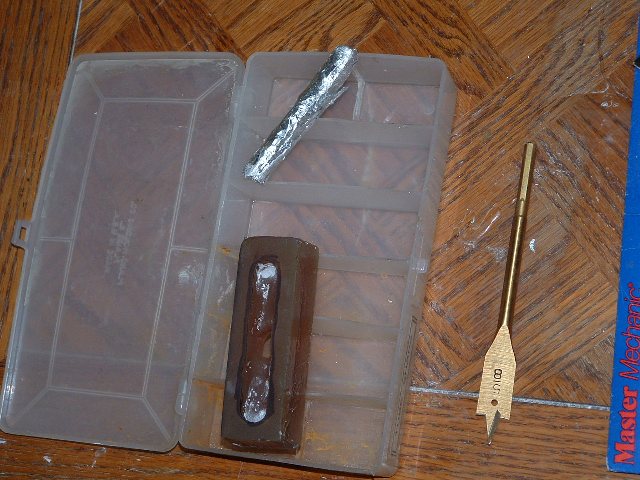
For the core, I used rolled up aluminum foil making a cylinder about 0.5" diameter by 3" long. It needs to be centered in the mold and can be two sided taped to the bottom, or resin poured and then submerged from the top. The core was coated with petroleum jelly for easy release from the resin.
I mix the resin with slightly less hardener than what is recommended on the can. I think this reduces the shrinkage that occurs during the "heated" cure time. FWIW, my room temp was around 60 F, and you need plenty of ventilation (fumes) and wear your paint fume/plastics mask.
The resin should set-up (harden) within the 1st hour. Once this occurs, heat will start to emanate from the resin. Once the resin is cool again, it can be removed from the mold. Remove the core from the resin block. This may require some slight trimming of the resin.
The core side which will be in contact with the top of your aluminum mold has to be flat sanded. I used coarse 40 grit until I got even sanded coverage, followed by a medium 150 grit. Attach the sandpaper to a flat surface, sand in figure 8 patterns, and rotate the block within your hand after a dozen or so 8's. Repeat for the top of the block.
On the top of the block locate and mark the center point. Protect the sides of the block and place in vice. Level the block in the vice and do not over tighten. I used a 5/8" spade drill with a 3/8" hand drill with bubble level. Drill slowly and carefully. Do not try to drill all the way through. The drill will jam as the outside edges break into the cavity, twisting the drill in your hand and breaking the block in two. So once the point of the spade bit is through, STOP. Now using twist drills open the hole to 3/8" . That size is probably sufficient, but I widened to 1/2" using a dremel type tool.
That's about it. It should be ready for a test pour. One issue to watch out for: After injecting the mold, when you go to lift the injector away, plastic on the nozzle has probably hardened to the block. If the block lifts, it may tear some of the baits within the mold. Lots of ways to solve that from happening. :)
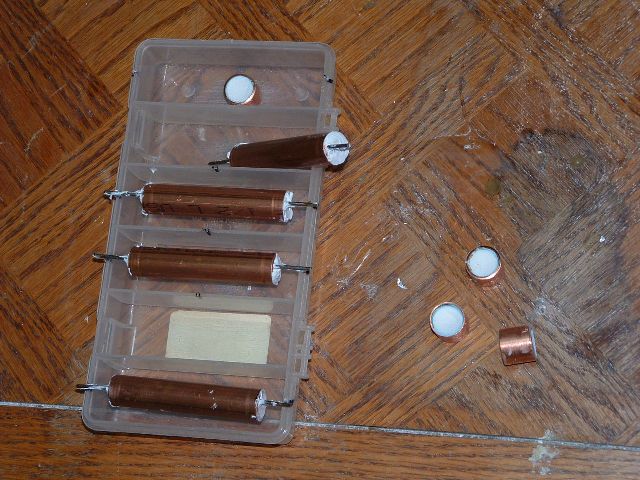
OK, now for what I am planning for the next pour. I will use 1/2" copper plumbing pipe cut to 3". A piece of coat hanger wire extends through and filled with caulk. Notches have been cut in the container to center the core. The outside will be coated with a thin layer of petroleum jelly. The resin will be poured until the top reaches just past the widest portion of the diameter of the copper pipe.
The short plugs in the picture are 1/2" copper couplings cut in half length wise. The inside diameter is 5/8", the perfect size for an injector nozzle. I am going to place one of them, in one of the molds to see if that is better than drilling. I don't know how well it will embed in the resin or if other problems will occur. I'll repost once I have done it.
Update: 2/5/11
It finally warmed up enough (34F) so I could run ventilation and pour the blocks. The pour went well. You do need to fill the mold right to the rim. It is also recommended that as soon as the resin sets, to remove the copper tubes. I didn't on a few, and the heat from curing softened the caulk that was in the ends of the tubes. Removing them after the cure was a little more tricky. I heated the copper pipe with a butane lighter so the resin block would not chip or break.
I ended up making five 4" blocks, two 2" blocks, and one large 5.25" block. The large block is for a Del's 3" stick bait pour mold. The 2" blocks are for a small Reaper mold, shooting two injector molds together, and extra sprue for injection molds. Plenty for now!
I hope this helps others extend the use of their pour molds.